Work with Factory Image for Spreadtrum Platform in UFi eMMC ToolBox v.1.2.0.447
Before we start, it's good to remind you again,
Why is there always a release note in every ufi software notice?
Of course that we all can understand, there are any additional features,
there are any changes and improvements,
So read carefully, so we can maximize the features in each update.
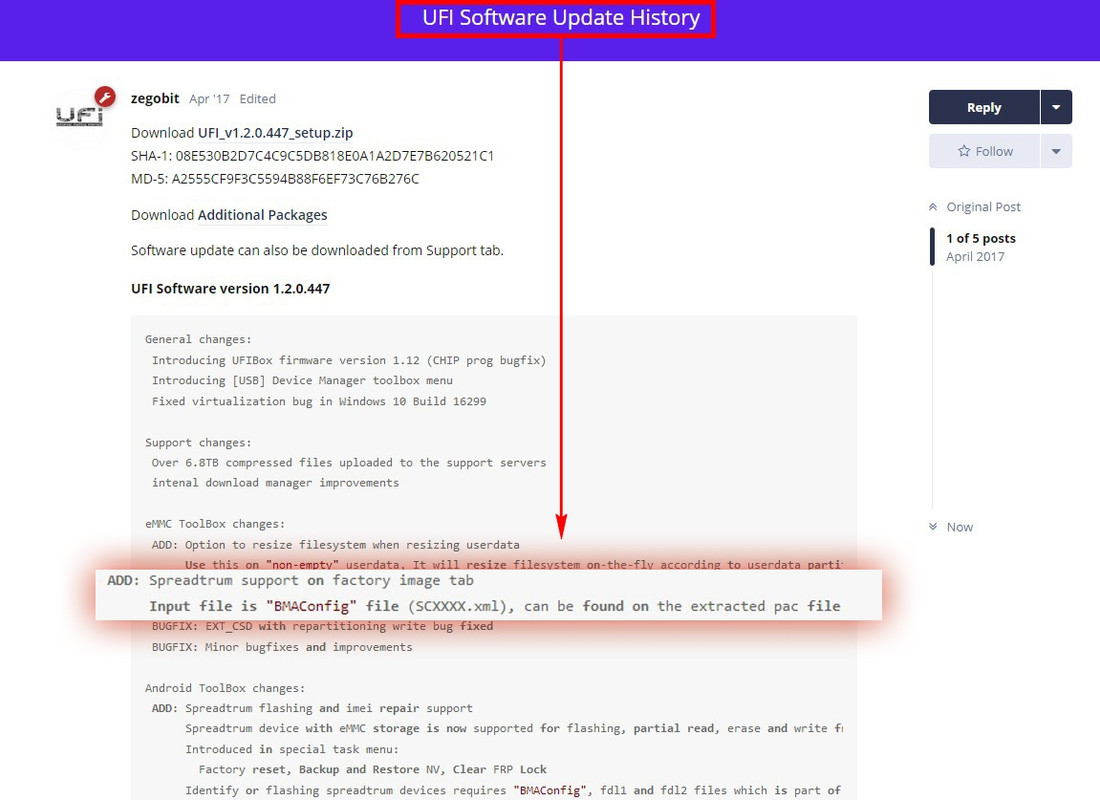
Based on the latest release note update UFI Software v.1.2.0.447,
which already support writing Spreadtrum platform firmware directly to eMMC via Factory Image menu,
and after reading the release note slowly,
to be able to write spread platform firmware directly to emmc,
apparently not by directly entering the Pac file,
but via the "BMAconfig" file that has extension.xml,
where this file can we get in pac firmware that have been extracted.
So, here is a step by step how it works.
Prepare the firmware file first
For Spreadtrum platform devices, in general official firmware package used are in PAC, P5C or CPB file.
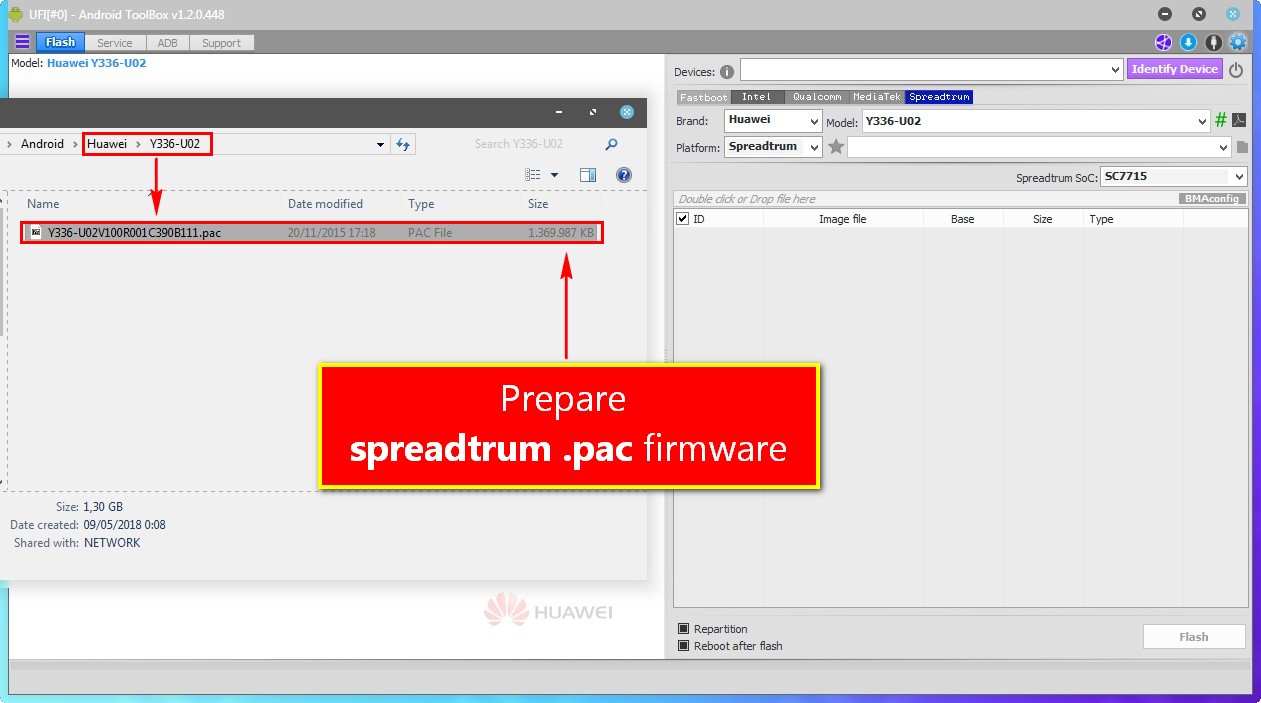
Tip: Put the firmware file right inside the model folder
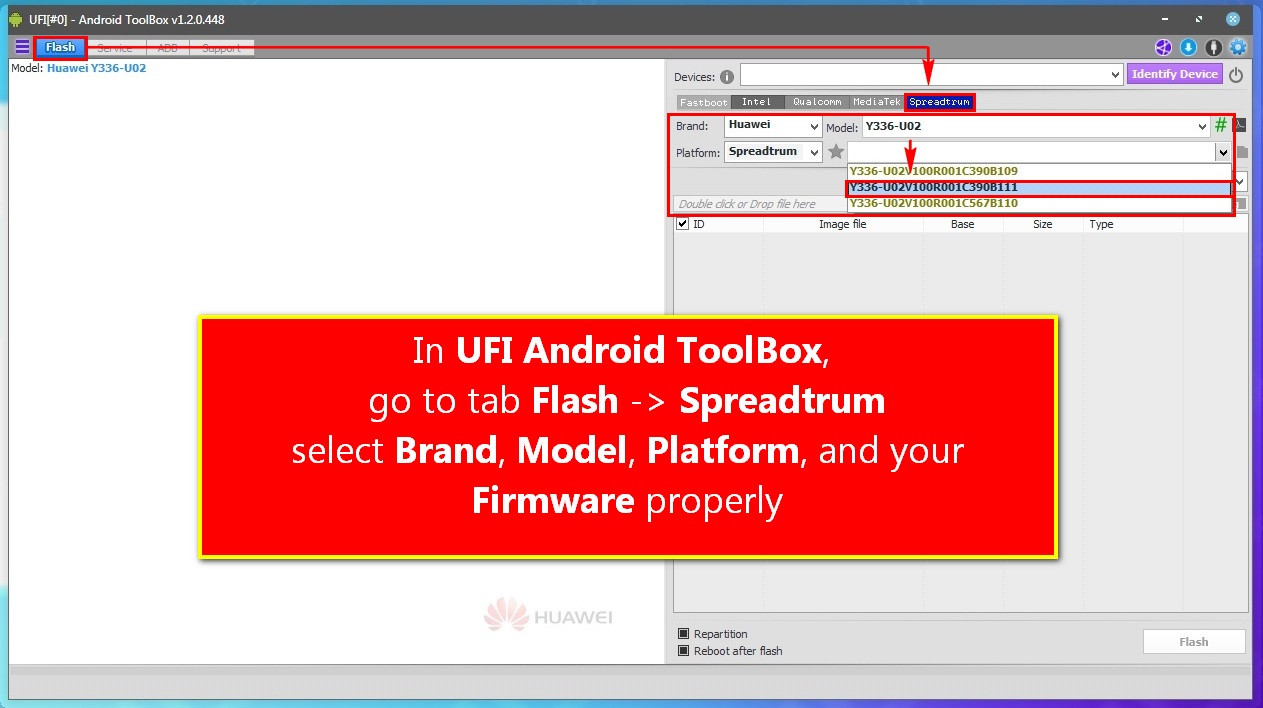
Open UFI Android ToolBox
To extract the official firmware package spreadtrum (PAC, P5C or CPB file),
go to the Flash tab -> Spreadtrum,
then select the appropriate Brand, Model, Platform, and Firmware.
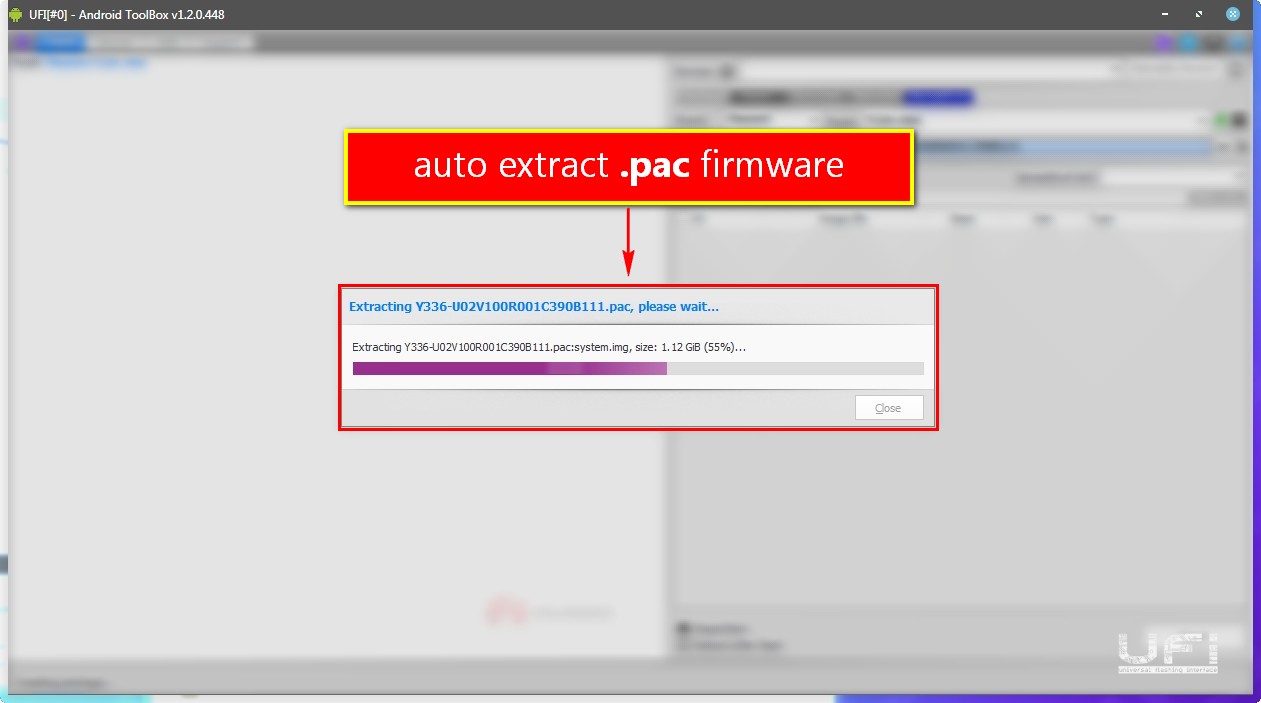
Auto extract Pac File
Shortly after selecting firmware, UFi will automatically extract it for you.
So, wait for the process to finish.
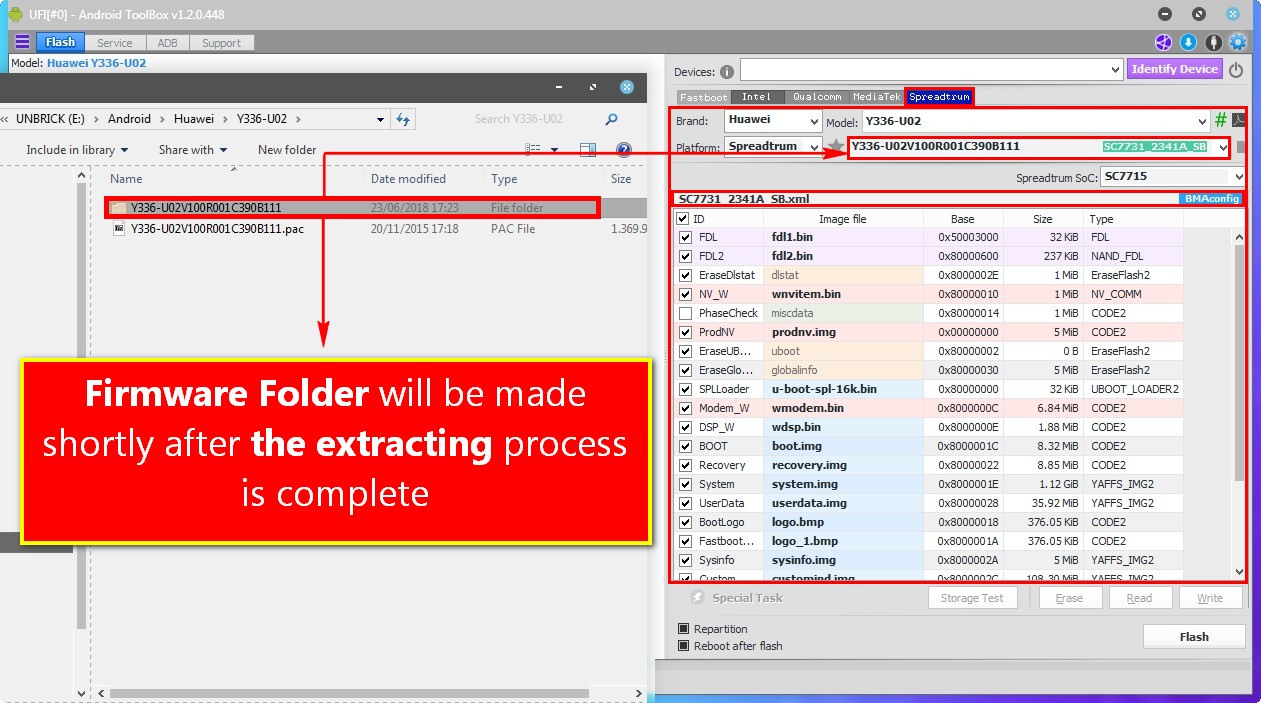
Firmware folder will be made
After the process of extracting the file, there will be a firmware folder.
Now you can delete the pac file to save your disk space.
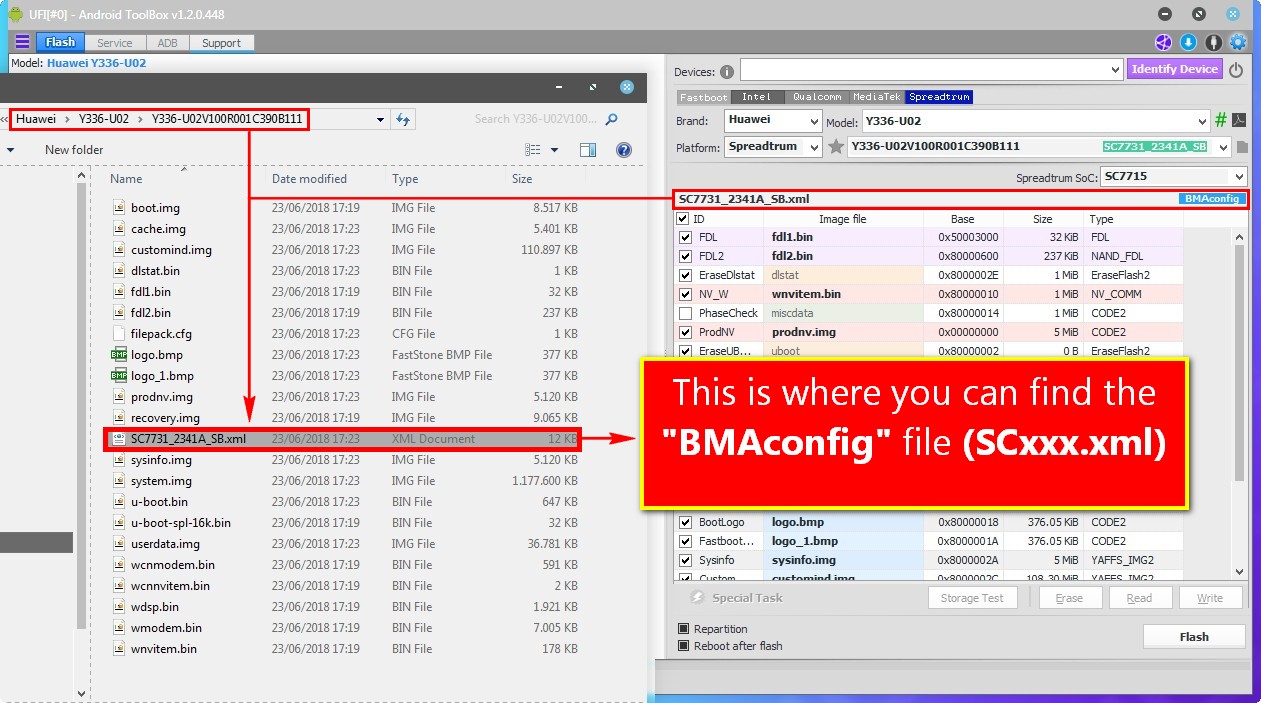
BMAconfig file (SCxxx.xml)
This is where you can find the BMAconfig file.
This file is later used, both for the process of identifying and the need to read/write (flashing), in addition to fdl1 and fdl2 files.
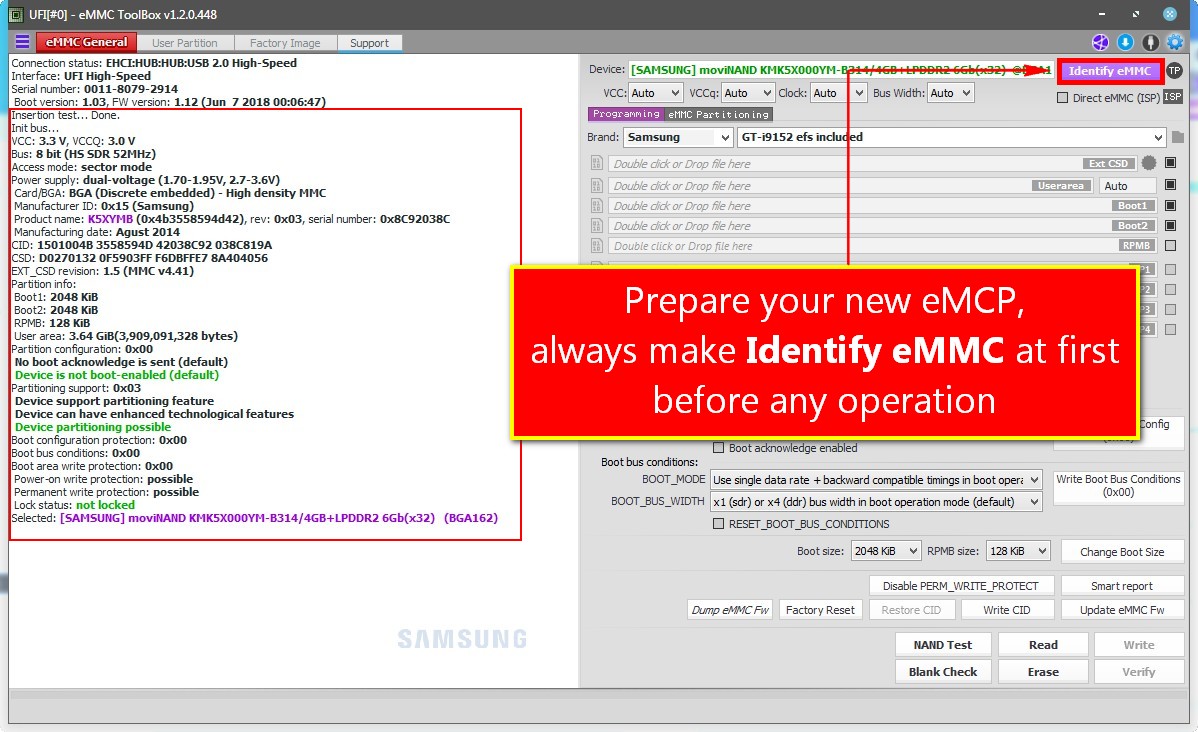
Set up a new eMMC
Open UFI eMMC ToolBox, Always remember to make "Identify eMMC" at First before any operation.
Perform other necessary processes, such as factory reset, or nand test before to the next step.
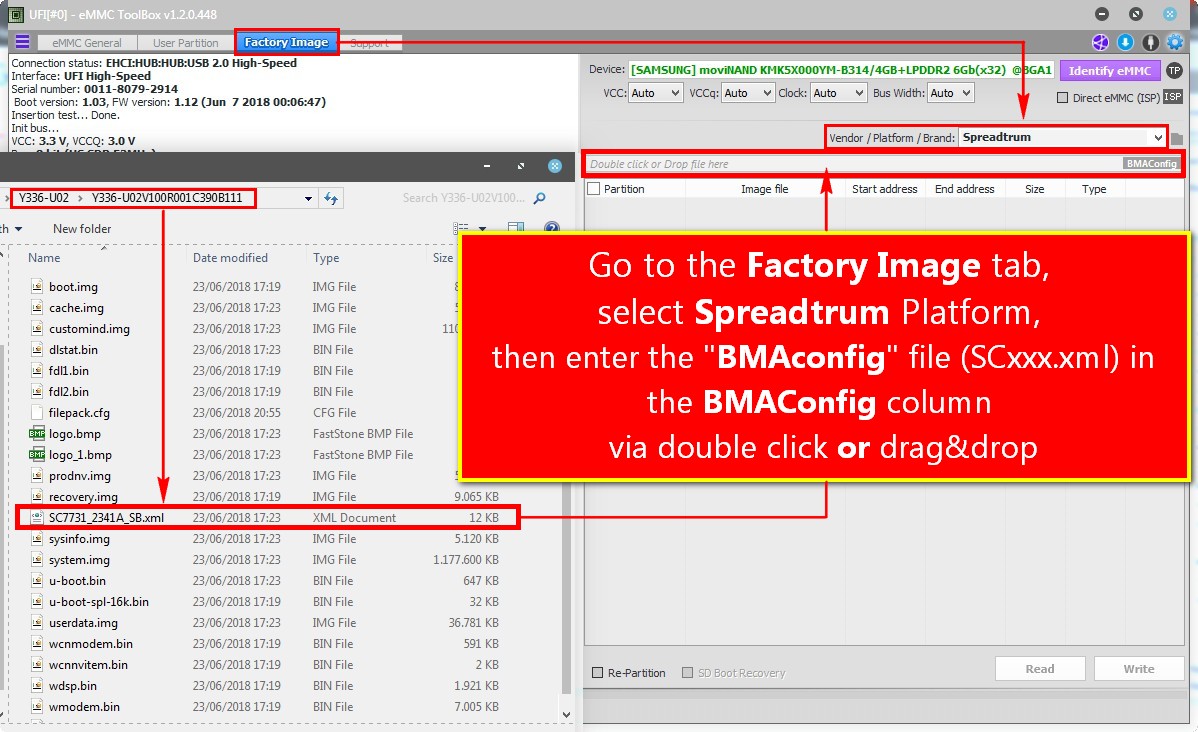
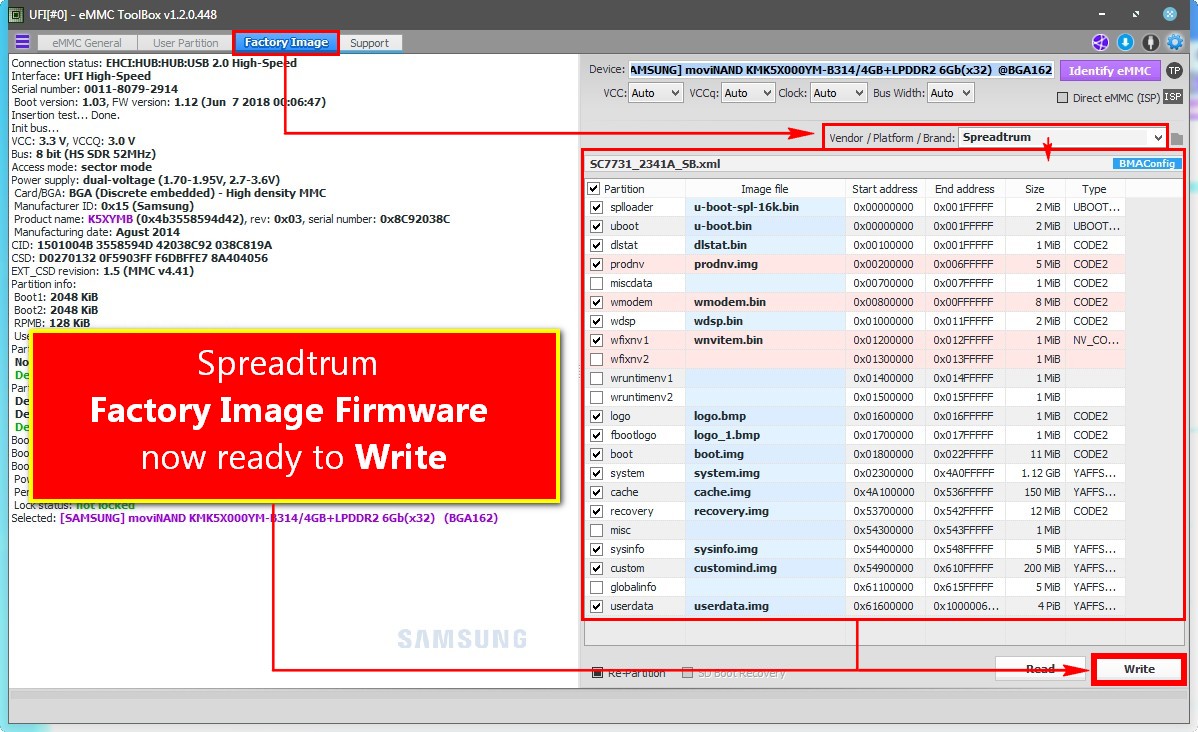
Factory Image Tab -> Spreadtrum
Now move to the Factory Image tab, select Spreadtrum in the scroll down menu Vendor / Platform / Brand.
Then enter the BMAconfig file in the extracted firmware folder earlier in the BMAconfig field.
Direct write Factory Image Ready
After entering BMAconfig, the firmware image package will be automatically loaded, and ready for writing.
Sit , wait with a cup of coffee
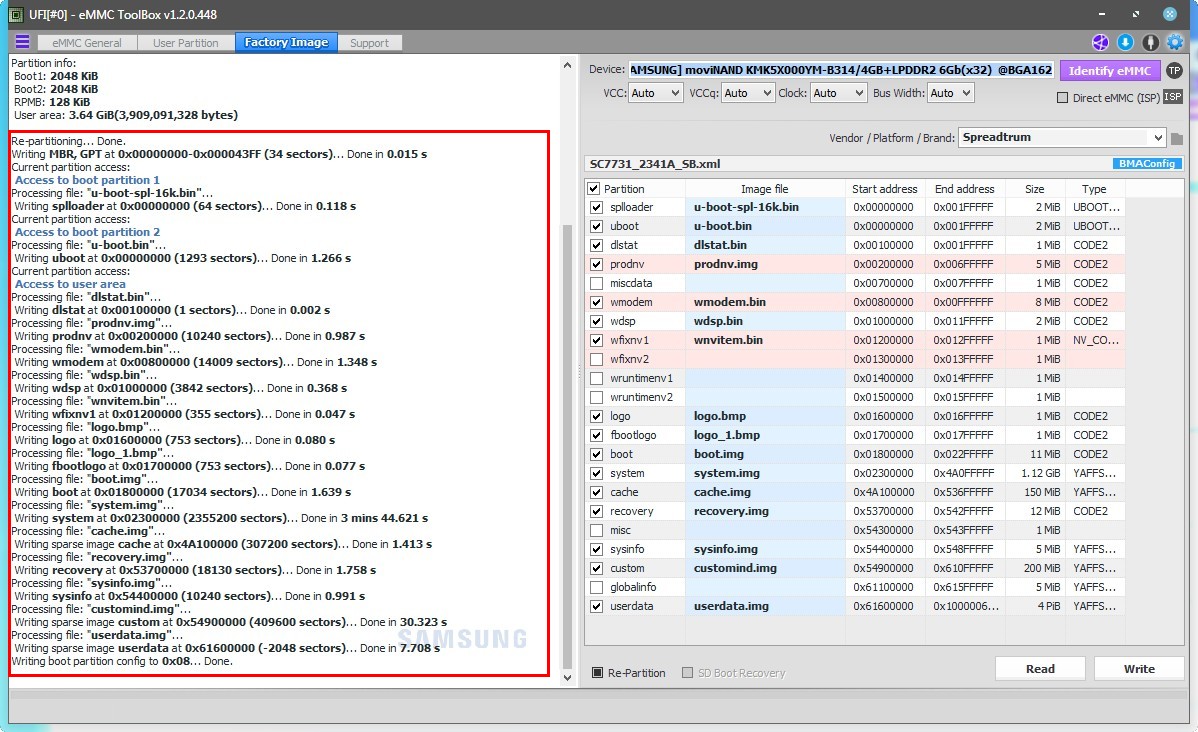
Writing Finish, eMCP replacement is Ready
To ensure successful writing, go to the User Partition tab, do "identify eMMC".
Pay attention to the log message field and the general user partition list.
Make sure the partition boot settings are correct,
Android system info readable, so it can be ascertained emmc replacement is in Full On state.
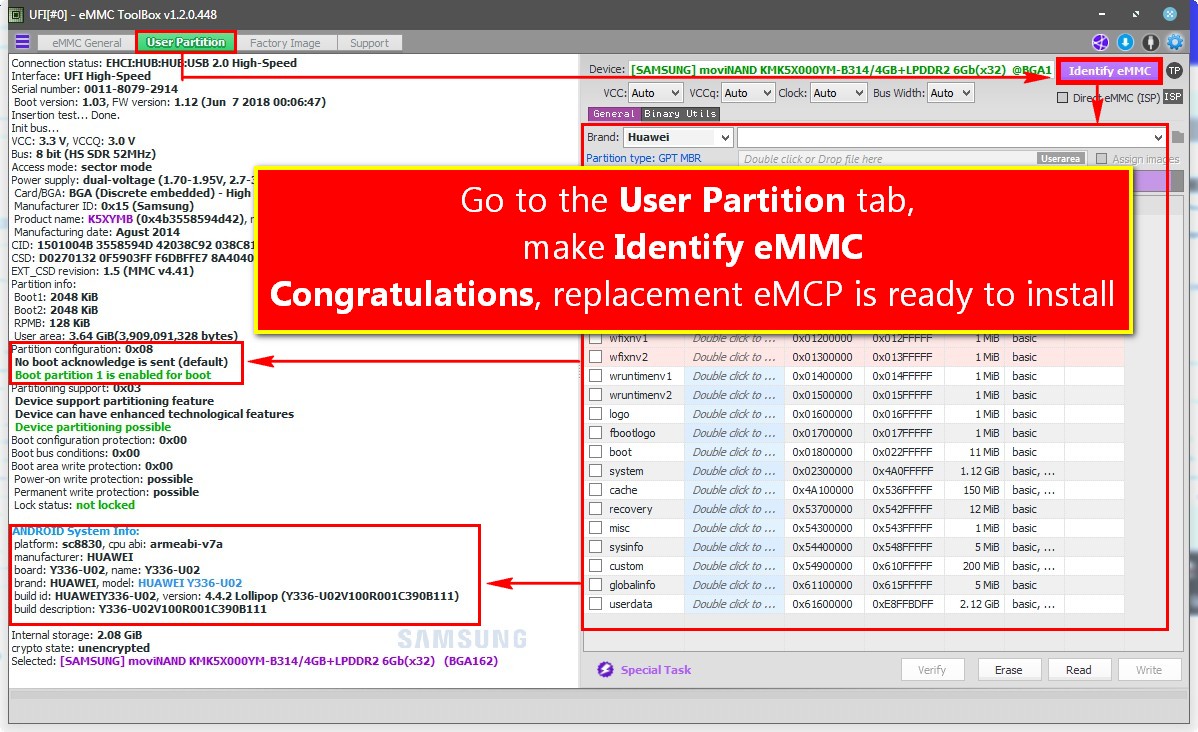
Congratulations, hope this helps a bit,
and good luck
B.R
madgoeslim.0f.ufibox